

Table of Contents
If you’re asking “what size label for Amazon FBA,” you’re usually asking two different questions at once: unit (FNSKU/product) labels and carton/shipping labels. This guide starts by separating those label types, then shows practical formats, print settings, and mistake-prevention checks.
Amazon FBA label sizes at a glance (unit vs carton)

The fastest way to pick the right label size is to decide what you’re labeling: the product unit or the shipping carton. Once you choose the label type, you can match a supported Seller Central format and print without scaling.
Fast decision gate
- Labeling individual units (FNSKU/product labels)? Choose a Seller Central item-label format (a common one is 30 labels per page, 1″ x 2 5/8″ on US Letter) and buy matching sheets.
- Labeling cartons (box/shipping labels)? Amazon’s shipping label guidance commonly lists 3 1/3″ x 4″ as a supported standard label size; some workflows also offer a 4″ x 6″ thermal option.
- Do not assume 4″ x 6″ is universal. It’s commonly associated with shipping/box (and sometimes pallet) labels, not item/FNSKU stickers.
At-a-glance table (use this before you buy labels)
| Label type | What it identifies | Common supported/used formats (US) | Where it goes |
|---|---|---|---|
| Unit label (FNSKU/product) | The sellable unit/SKU | Common format supported in Seller Central tools: 30-up, 1″ x 2 5/8″ (US Letter) | On the product packaging (flat, scannable area) |
| Carton/shipping label | The shipment box/carton | Commonly cited supported standard: 3 1/3″ x 4″; thermal option 4″ x 6″ in some flows | On the outside of each carton (not on seams/corners) |
How to verify in minutes (no guessing)
- In Seller Central, open the workflow you use to create shipments (for example, “Send to Amazon” or shipment creation).
- Look for the print setting that controls label paper / sticker type / label format.
- Print one test page at “actual size” on plain paper before printing on labels (especially if you’re switching printers or paper sizes).
The first decision: Product (FNSKU) labels vs box/shipping labels
Now that you’ve seen the quick sizes, the key is this: FNSKU labels identify units, while shipping labels identify cartons. If you mix them up, you’ll buy the wrong labels and risk misprints or rework.
Unit vs carton label comparison
| Question | Unit (FNSKU/product) label | Carton/shipping label |
|---|---|---|
| “What am I labeling?” | The individual sellable unit/SKU | The outer box/carton of the shipment |
| “What size should I buy?” | Choose a Seller Central item-label format (commonly 30-up 1″ x 2 5/8″ sheets for US Letter) | Commonly cited supported standard is 3 1/3″ x 4″; some workflows offer 4″ x 6″ thermal |
| “What printer fits best?” | Sheets (laser/inkjet) for small batches; thermal for higher volume (if your workflow supports it) | Often thermal-friendly in supported flows; sheets also possible depending on settings |
| “Where does it go?” | On product packaging (flat, unobstructed) | On each carton (avoid seams/corners) |
Boundary notes you should not skip
- Amazon label outputs can differ by workflow (small parcel vs LTL/palletized). Always confirm which label you’re printing (unit vs carton vs pallet) before buying supplies.
- If your barcode strategy is changing in 2026, confirm whether you’ll need more unit labels. Amazon has announced barcode requirement changes effective March 31, 2026; check the related Seller Central guidance when you publish or ship.
When you need each label (a simple inbound workflow)
With the label types defined, here’s the practical rule: print unit labels when your units need Amazon barcodes, and print carton labels for every box you send in. Most confusion disappears once you map labels to these steps.
- Create your shipment in Seller Central and confirm what labels are generated for your workflow.
- If unit labels are required for your inventory plan, download and print the unit (FNSKU) labels and apply them to each sellable unit.
- Print carton/shipping labels for every box, then apply them to the outside of each carton (flat, visible, not on seams).
Unit/FNSKU label sizes (US) + how to choose the right format in Seller Central
Once you know you’re labeling units, the safest approach is format-first: pick a supported Seller Central label format, then buy label stock that matches it. This prevents the most common “my labels don’t line up” problem.
A practical, format-first method
- In your unit-label print screen, locate the setting for label paper/sticker type (or label format).
- Select a format you can reliably source and print. A widely used example is 30 labels per page (1″ x 2 5/8″) on US Letter.
- Buy matching blank labels (and use a matching template if you print outside Seller Central).
- Print a test page at actual size (not “fit to page”) before committing to hundreds of units.
Common US unit-label formats you’ll see mentioned
- 30-up sheet format (1″ x 2 5/8″) is frequently referenced as a practical default for US sellers.
- Many guides commonly cite a general acceptable size range (often quoted as 1″ x 2″ to 2″ x 3″) for Amazon barcode labels. Treat this as guidance and verify against your current Seller Central labeling screen.
Important boundary conditions
- Not every workflow requires an FNSKU sticker on every unit; your barcode choice and settings determine this. Amazon has announced barcode-related changes effective March 31, 2026, so re-check the latest guidance before you standardize a long-term labeling process.
- If you can’t confirm a “required” size in an official Seller Central page you can access, treat exact requirements as variable and rely on the format you select in Seller Central as the source of truth.
A practical US default (and when it doesn’t work)
If you just need a starting point, 30-up (1″ x 2 5/8″) is a common, easy-to-source US default for unit labels. It stops working when your packaging doesn’t offer enough flat space or when labels end up on seams or curves.
Use the default when:
- Your packaging has a flat panel large enough for a clean, scannable label.
- You’re labeling small-to-mid sized retail packaging (boxes, flat polybags, cartons).
Consider alternatives when:
- The product surface is tiny (very small units) or highly curved (bottles, tubes).
- You can’t apply the label without wrapping it over a seam or corner.
Carton/shipping label sizes + when 4×6 thermal applies
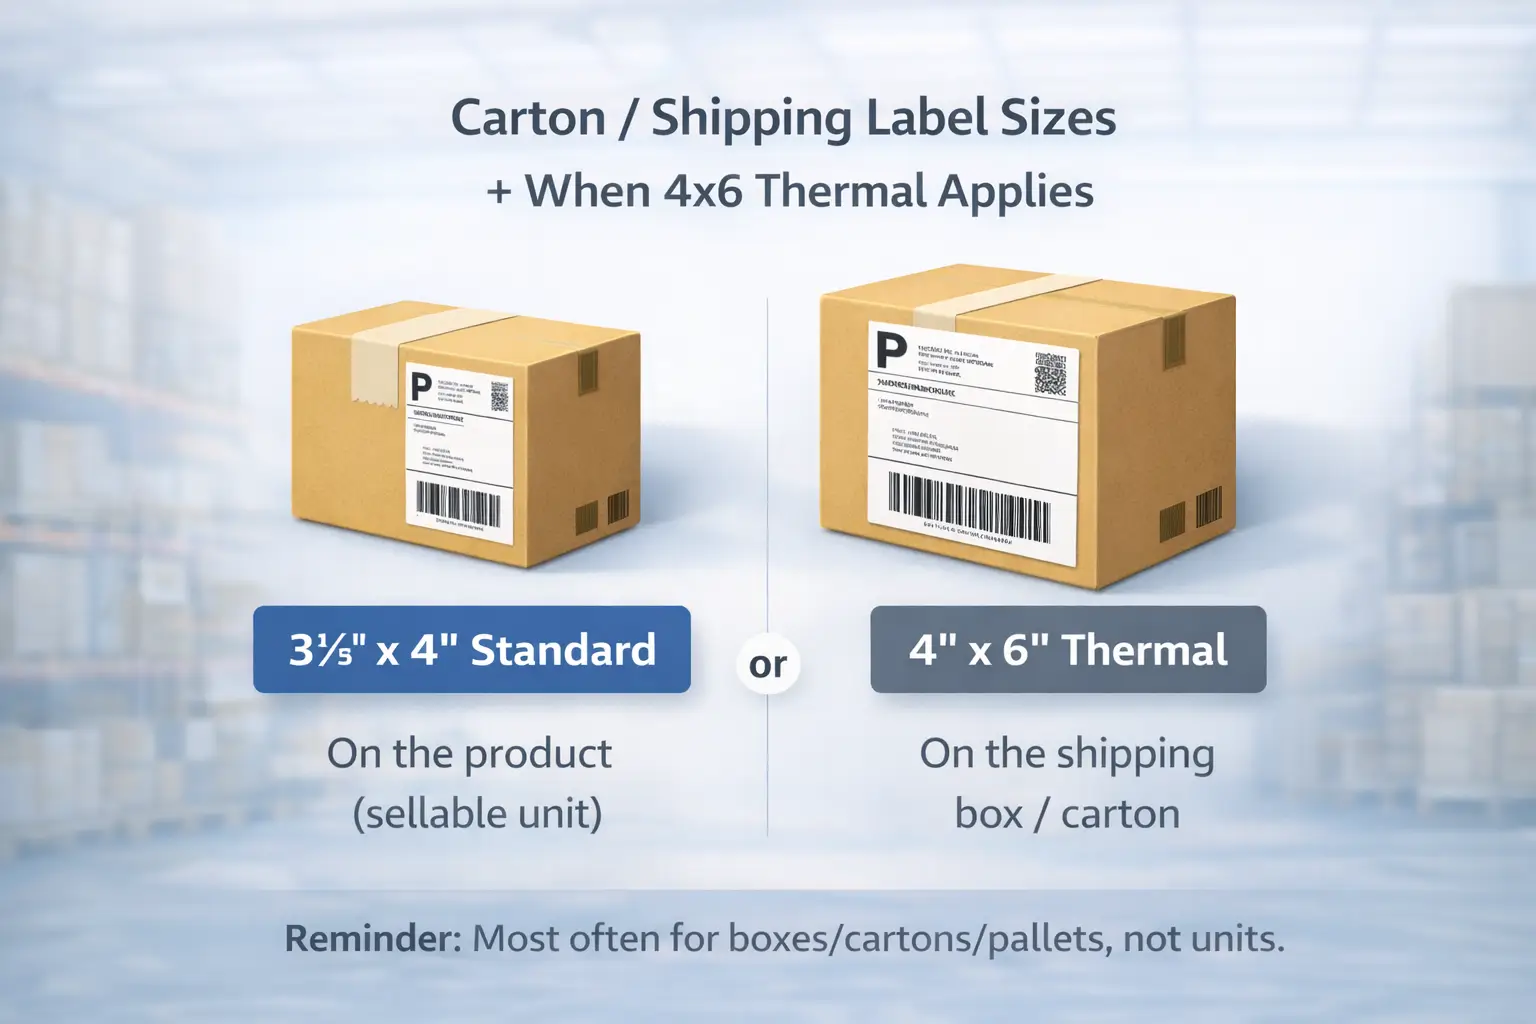
After unit labels, carton labels are simpler: use a shipping label size and print method that your shipment workflow supports. For US workflows, a commonly cited supported standard shipping label size is 3 1/3″ x 4″, and some flows also allow 4″ x 6″ thermal printing.
What “4×6 thermal” usually means (and what it doesn’t)
- It’s most often associated with carton/shipping label printing (and in some cases pallet label options), not with unit/FNSKU stickers.
- Your best protection against buying the wrong labels is to confirm the exact print option in your shipment label screen before you purchase label rolls in bulk.
Carton label placement basics (high-impact, low-effort)
- Put the label on a flat side of the carton where it won’t be creased.
- Avoid placing labels on seams, corners, or tape lines.
Sheet labels vs thermal printers: a quick decision checklist
Now that label types are clear, your next decision is printing setup: sheets are simplest for small batches, while thermal printing is often easier to scale when supported. Use this checklist to choose based on your workflow, not on someone else’s equipment list.
Decision checklist
- Volume
- Small batches or occasional shipments: sheets are usually fine
- Frequent shipments or many SKUs: thermal often reduces friction (if supported)
- Error risk
- If you often see misalignment or accidental scaling: thermal can reduce “page layout” problems
- Speed
- If you want fast “print-and-stick” without sheet handling: thermal is typically faster
- Label type you print most
- Mostly carton/shipping labels: thermal is commonly used in supported flows
- Mostly unit/FNSKU labels: sheets are common; thermal may still work, but confirm your print options
- Team workflow
- If multiple people label in parallel: standardizing one format and one print method reduces mistakes
Starter path (simple and safe)
- Start with sheet labels for early-stage, low-volume labeling.
- Move to a thermal workflow once shipments become frequent enough that printing time and alignment mistakes are costing attention.
Print settings that prevent “shrunk” barcodes (A4 vs Letter, scaling, alignment)
Whatever printer you use, the most important rule is: do not let your PDF printer settings scale the barcode. Most “label problems” stories start with “fit to page” or the wrong paper size.
Step-by-step: print without accidental resizing
- Select the right label format in the Seller Central label print screen (match it to your label stock).
- Download the label PDF and open it in a PDF viewer that shows print scaling options.
- Set print scaling to Actual size or 100% (avoid Fit, Shrink, or Scale to printable area).
- Confirm the paper size matches your stock (US Letter vs A4).
- Do a test print on plain paper and hold it behind a label sheet to confirm alignment before you print on labels.
Troubleshooting quick fixes
- If labels drift down the page: check margins and paper size (Letter vs A4 mismatch is a frequent culprit).
- If barcodes look squashed or too small: you’re almost certainly scaling; switch back to Actual size.
- If the last column or row is off: try a different PDF viewer or printer driver (some drivers add non-obvious scaling).
Placement & scan reliability: whitespace, flat surfaces, and barcode conflicts
After you print correctly, scan reliability comes down to placement: labels need enough whitespace and a flat surface so the barcode scans quickly. Don’t solve a tight packaging problem by shrinking the barcode; solve it by choosing a better surface or packaging method.
Do / Don’t placement rules
- Do place labels on a flat, unobstructed area (not on corners, seams, or curves).
- Do keep clear whitespace around the barcode and related text; verify current specs in Seller Central if you need exact measurements.
- Don’t cover the label with tape or wrinkles that create glare or distortion.
- Don’t resize to fit a smaller sticker; it can reduce scan reliability.
Barcode conflict rule (simple, but important)
- Aim for one clearly scannable barcode on the sellable unit. If your product already has a manufacturer barcode (UPC/EAN) and you’re applying an Amazon barcode label, avoid leaving multiple scannable barcodes visible if your workflow expects Amazon barcodes at receiving. When in doubt, verify the current barcode and labeling guidance for your inventory plan.
Quick QA check (30 seconds per SKU)
- Scan a few labeled units with a handheld scanner or phone scanner app:
- The barcode reads consistently
- The printed text is legible
- The label sits flat and isn’t wrapped over an edge
When the label doesn’t fit: tiny items, curved packaging, polybags, bundles
If your packaging doesn’t offer a flat spot, you still have options: change the labeling surface, not the barcode size. The goal is a flat, scannable label area, even if that means labeling an outer package.
Scenario mini-table
| Packaging issue | Safer option (typical) | What to avoid |
|---|---|---|
| Tiny unit (no flat face) | Label the outer packaging (for example, a polybag) so the label stays flat | Shrinking the barcode to unreadable size |
| Curved container (bottle/tube) | Use the flattest area available, or label an outer wrap or package | Wrapping labels over a curve or seam |
| Multipack / bundle | Label the final sellable unit (the bundle packaging) consistently | Labeling inner components inconsistently |
Practical guardrails
- If the only place a label fits is across a seam or corner, it’s usually better to change packaging (for example, polybag or outer carton) than to force the label onto a bad surface.
- Some product categories have additional prep rules; treat this section as practical guidance and verify category-specific requirements in Seller Central if applicable.

Outsourcing labeling: what to send your prep warehouse to avoid SKU mix-ups
Once labeling gets complex across many SKUs or suppliers, outsourcing can reduce mental load, but only if you provide a clear handoff package. Use this checklist to prevent the most common “wrong label on the wrong SKU” failure.
Prep handoff checklist (send this before goods arrive)
- SKU-to-label mapping
- Your SKU list and quantities by SKU
- The exact FNSKU label files for each SKU (clearly named)
- Format and print instructions
- Which label format to use (for example, 30-up sheets vs thermal)
- Print at 100 percent or actual size
- Paper size (US Letter vs A4) if you use sheets
- Placement rules
- Where labels should go on the product
- How to handle existing manufacturer barcodes (what to cover, if applicable)
- Carton plan inputs
- Case pack vs mixed carton rules
- Any carton labeling preferences (carton labels on which sides)
- Exception rules
- What the prep team should do if items arrive damaged, mismatched, or missing barcodes
- Who to contact and what photos you want before decisions are made
- QC checkpoints
- Sample scan test for first units of each SKU
- Photo confirmation for first labeled unit per SKU (especially for look-alike packaging)
If you’re shipping from multiple suppliers and want one China-side team to consolidate, check labeling, and ship door-to-door to FBA, FBABEE can help coordinate prep and freight as an independent partner (not affiliated with Amazon). Start by sharing your SKU list, target marketplace, and shipment plan.
Common labeling mistakes that trigger relabeling or receiving delays (pre-ship checklist)
Whether you DIY or outsource, the best protection is a last-pass check: most label problems come from a small set of repeatable mistakes. Treat the list below as a stop-the-line checklist before cartons leave your warehouse.
Top mistakes to avoid
- Wrong label on the wrong SKU (look-alike packaging is a common trigger)
- Missing unit labels when your workflow expects Amazon barcodes (verify your inventory plan)
- Multiple scannable barcodes visible (UPC plus Amazon barcode) when your process expects a single scannable code
- Barcodes printed too small due to fit-to-page scaling
- Labels placed on seams, corners, or curves that crease or distort the barcode
- Low print quality (smears, fading, low contrast)
- Labels covered with tape or wrinkled packaging that creates glare or distortion
- Carton labels placed where they can be torn or obscured (seams, edges)
Pre-ship mini-checklist (fast, repeatable)
- Pick 3 units per SKU and confirm label is correct and scannable
- Confirm print scaling is 100 percent or actual size
- Confirm carton labels are on flat surfaces and match the shipment
- Confirm you can’t easily see multiple competing barcodes on the unit (if that’s not intended)
- Photograph one golden sample labeled unit per SKU for reference
FAQ: quick answers to common Amazon FBA label questions
To wrap up the decision points, here are quick answers to the most common label-size questions sellers ask.
Q: What size are Amazon FBA shipping labels?
A: A commonly cited supported standard is 3 1/3″ x 4″, and some shipment workflows also offer a 4″ x 6″ thermal option. Confirm the exact label type and format in your shipment print settings before buying label rolls.
Q: What size should an Amazon FBA product (FNSKU) label be?
A: Many sellers use a supported format like 30-up 1″ x 2 5/8″ (US Letter), and many guides cite a general range around 1″ x 2″ to 2″ x 3″. Because formats and requirements can vary, rely on the format you select in Seller Central as your final check.
Q: What’s the difference between product labels and box labels in an FBA shipment?
A: Product/FNSKU labels identify the individual unit, while box/shipping labels identify the outer carton in your shipment. They use different sizes and often different print setups, so choose label type first, then choose size and printer based on that label type.
Q: Should I use 30-up sheets or a thermal printer for FNSKU labels?
A: Sheets are simplest for small batches; thermal can be easier to scale when your workflow supports it and you want to reduce layout and alignment problems. Either way, the key control is printing at actual size and applying labels on flat surfaces.
Q: Do I need to cover the manufacturer UPC/EAN when I apply an FNSKU label?
A: A safe principle is to avoid having multiple competing scannable barcodes visible on a unit if your process expects Amazon barcodes at receiving. If you’re unsure, verify the current barcode choice and labeling guidance for your inventory plan.
Q: Why do my FNSKU labels print misaligned or the barcode looks shrunk?
A: The most common causes are paper-size mismatch (A4 vs US Letter) and PDF print scaling (fit-to-page). Set printing to 100 percent or actual size, confirm paper size, and test print on plain paper before using label sheets.
Q: What do I do if my product is too small or curved for an FNSKU label?
A: Don’t shrink the barcode to force it onto a bad surface. Instead, label an outer package (like a polybag) or choose the flattest available area so the label stays unobstructed and scannable.
Q: What are the biggest FBA mistakes to avoid?
A: Mixing up unit vs carton labels, printing with accidental scaling, placing labels on seams or curves, leaving multiple competing barcodes visible, and skipping a quick scan test. A short pre-ship checklist catches many of these before cartons leave the warehouse.
Summary: how to verify your label format today + next steps
If you remember only one thing, remember this: label type first (unit vs carton), then size and printer. In practice, the “right size” is the one that matches the Seller Central format you select and prints at actual size without distortion.
Quick verification steps
- Confirm whether you need unit labels for your current inventory plan (and re-check if your barcode strategy is changing in 2026).
- Confirm your shipment workflow’s supported carton label format before buying thermal rolls in bulk.
- Standardize one print method and one QA routine (test print, scan test, golden sample photos).
FBABEE is an independent logistics and FBA prep service provider (not affiliated with Amazon). If you want help consolidating multi-supplier goods in China, applying labels with a clear handoff checklist, and shipping door-to-door to FBA, share your SKU list and shipment plan so a prep workflow can be scoped.


